MMO Tech Demo
This demo uses an older version of Colyseus.
This technical demo shows one way to make a basic MMO: a chat system, player persistence, multiple flowing Colyseus.Rooms and networked interactable objects. The demo does not include sharding or any other load balancing you would need for a production-scale MMO. This demo is designed to work with Colyseus version 0.14.7 and Unity version 2020.3.1f1.
Download demo (View source code)
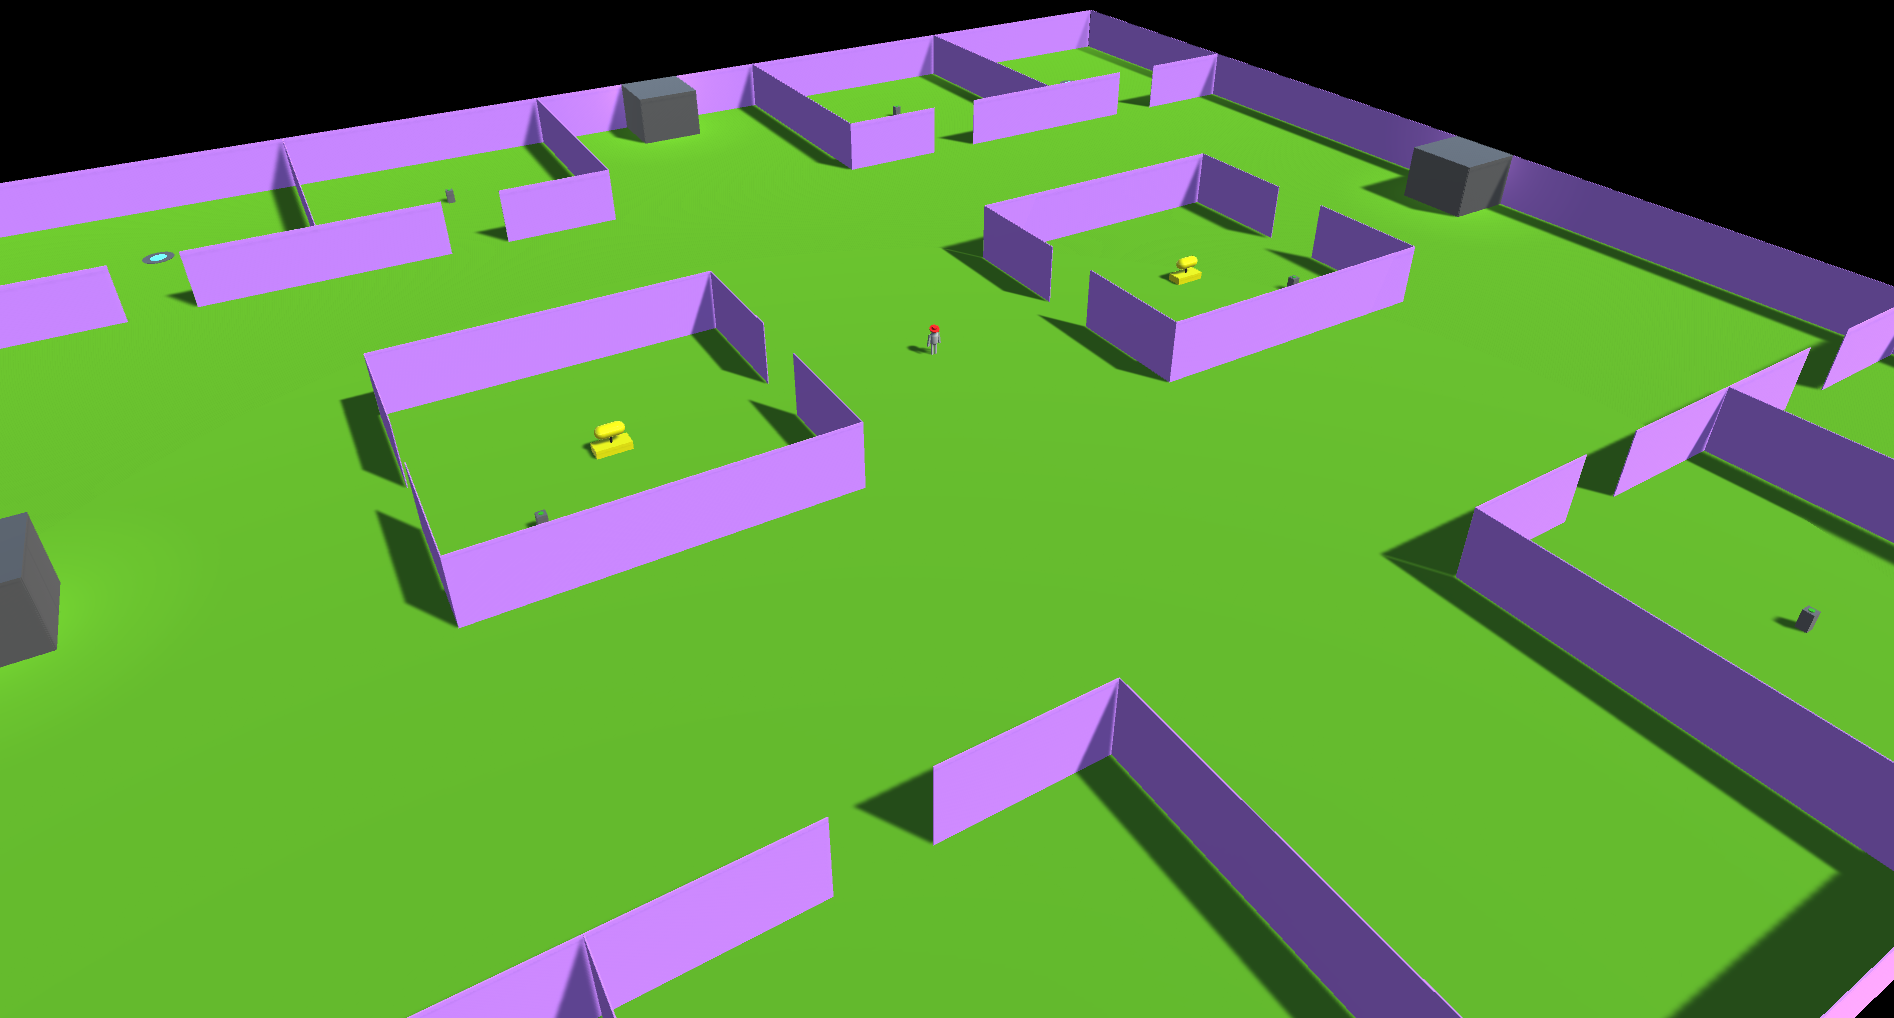
Getting Started
Launching a local server
You need to install and launch the server from the provided Server directory for this demo to function properly. Simply follow the instructions found underneath “Running the demo server” in the Unity section of these docs.
Additionally, this demo uses MongoDB for player persistence. To run it locally, set up a local DB or provide your own (see the “Adjusting the Demo” section).
See the MongoDB website for details on how to set up a local instance
ColyseusSettings ScriptableObject
All server settings can be changed via the ColyseusSetting ScriptableObject located here:
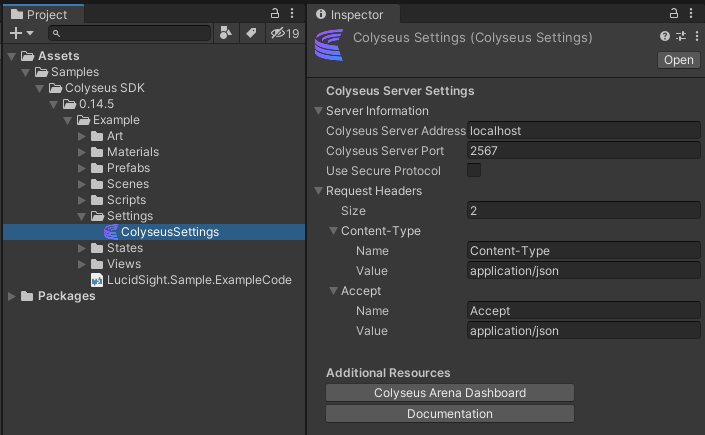
If you are running a local server, the default settings should be sufficient. To host a server, change the Colyseus Server Address and Colyseus Server Port values accordingly.
Playing the Demo
Start the player in the scene “MMOLoginScene” located at ColyseusTechDemo-MMO\Assets\Scenes\MMOLoginScene. If this is your first time, you’ll need to create an account. Input your e-mail, password and then login to begin. If you are successful, the client will load the “TowerScene” scene and place a NetworkedEntity in it. At any point you can press the escape key to view the controls, customize your avatar or exit to the main menu. You will be transferred into a different room by walking into the grey cubes that are located on sides of rooms.
Controls
The controls for this demo are visible in the Escape menu at any time and are as follows:
| Input | Description |
|---|---|
| W,A,S,M | Movement |
| Hold Shift | Sprint |
| Q,E | Rotate Avatar |
| Scroll Up/Down | Zoom In/Out |
| Hold and Drag Right Mouse Button | Camera Pivot |
| ` | Toggle Chat Window |
Demo Overview
This demo was designed to show how a user could potentially design and implement an MMO style game using Colyseus. It highlights the following features:
Dynamic Rooms
MMORooms are created and disposed of as needed. When a player enters a grid space, we join a room where it’s progress value is set to the grid values, as seen in app.config.ts:
const server = defineServer({
  rooms: {
    lobby_room: defineRoom(MMORoom).filterBy(["progress"]) // Filter room by "progress" (which grid we're wanting to join EX: -1x2)
  }
})
As players move throughout the world, they join/leave rooms based off of their position in the world grid. A message is sent from the client to the server stating that the player is trying to update their progress, which we then catch in MMORoom.ts:
messages = {
    "transitionArea": (client: Client, transitionData: Vector[]) => {
        if (transitionData == null || transitionData.length < 2) {
            logger.error(`*** Grid Change Error! Missing data for grid change! ***`);
            return;
        }
        this.onGridUpdate(client, transitionData[0] as  Vector2, transitionData[1] as  Vector3);
    }
}
After determining the new grid position, the client is given a new SeatReservation to consume, joining the correct Colyseus.Room for that position. A similar flow also occurs when Logging in/Signing up (see Player Persistence section).
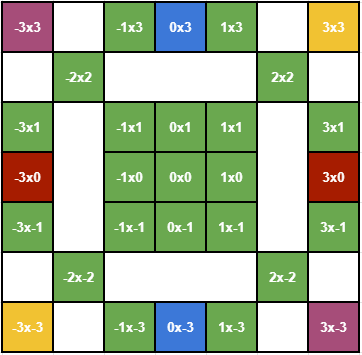
The image above shows the grid map for this demo. The non-green grid spaces contain exits that will wrap around to each other, allowing you to travel from one to the other. For example in grid space -3x3, you can take the North West exit and you will be placed into grid space 3x-3. All other contiguous grid spaces will have exits to each other. The grid spaces that are only touching corners will have exits in those corners to traverse the grid diagonally.
Chat System
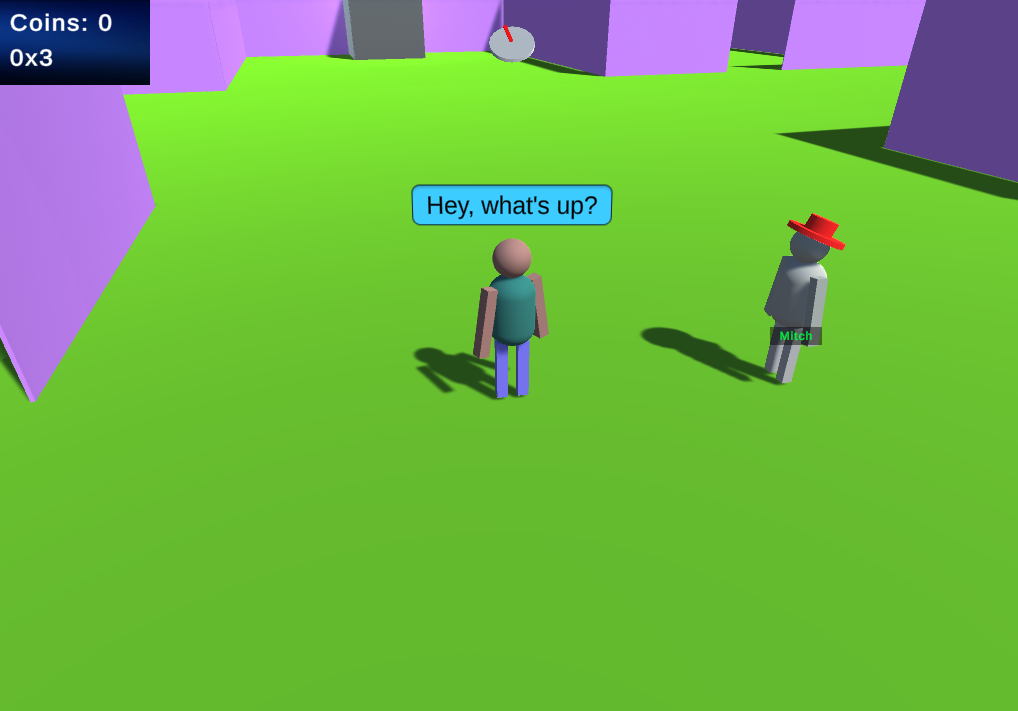 An additional Colyseus.Room is used to handle the Chat system:
 ChatRoom.ts. In both the client and the server, anywhere we join or leave an MMORoom we also join or leave a ChatRoom. These ChatRooms are filtered by roomId which is the ID of the MMORoom it is connected to.
When a client sends a message, it’s added to the ChatRoomState’s ChatQueue, triggering a state change on all connected clients. Every new message that comes in receives a timeStamp value, after which it will be removed from the queue.
Player Persistence
This demo uses a very basic user authentication system to persist players across unique user accounts. Do NOT treat it as a real-world example of how to implement user authentication. Do NOT use any email and password combination you actually use anywhere else.
In this demo, unique player accounts are persisted in a database. Each account tracks the player’s progress (their current and previous room), position, coin balance, and more. A player account is necessary to play this demo. With successful user authentication, a seat reservation for a room is sent back to the client. The session Id of that seat reservation is saved to the player’s account entry in the database as a “pendingSessionId”. When the client attempts to consume the seat reservation to join the room, the “onAuth” hook looks up a player account by that “pendingSessionId”. If no player account with a matching “pendingSessionId” exists, the client will not be allowed to join the room. However, with a successful player account look up, the “pendingSessionId” will become an “activeSessionId” and the client will join the room. A player’s progress is used to filter rooms during the matchmaking process. For example, a player with a progress value of “1,1” (grid coordinates 1x1) will matchmake into an existing room with the same progress value. If no room with that progress value exists, then one shall be created. This way, rooms for each grid coordinate only exist as players are in them. A player’s progress is updated as they leave one grid area to move to another via one of the exit doors.
Interactable Elements
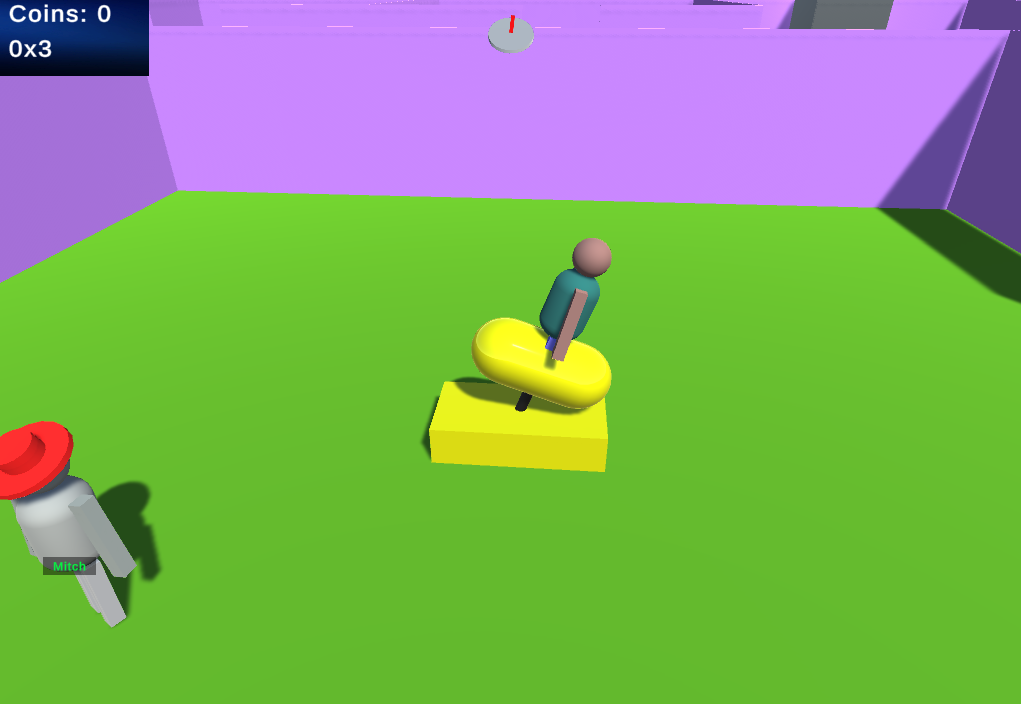 Grid spaces may have
 Interactables scattered around them. These are frontend representations of InteractableState schema objects that are placed within the editor when we make a new grid space prefab. When a player performs an interaction with one of these objects, the client will send a objectInteracted message to the server. If the server does not yet know the provided Interactable ID, it creates a new schema reference. That reference is added to the room’s schema map and makes its way back to the client. The server will then check if the Client meets the requirements to perform an interaction. If successful, all clients will receive an objectUsed message broadcast, along with the interactable’s ID and the user who interacted with it. On the client’s side, the appropriate NetworkedEntity and Interactable objects will be told to perform together.
This demo comes with 4 different types of interactables that you can find in the various grid spaces:
- Button Podium
- Gives the interacting user 1 coin per press
- Coin Op
- A small ride that will disable your controls temporarily and bounce your NetworkedEntity around. Costs 1 coin per use
- Teleporter
- A small platform that will teleport a user to its “exit platform”. Costs 2 coins to use
- FX Swirl
- An alternate to the Button Podium that costs nothing and gives nothing, but displays a cool effect when pressed (uses the DEFAULT server type)
Adjusting the Demo
As you play around with this demo, you may want to make some adjustments to better familiarize yourself with what is happening. Below, you’ll learn how to make these minor adjustments.
Using your own DB
To point this demo at your own database, provide a different Mongo connection string in the arena.env file in the Server directory. The current string expects a locally hosted mongo db:
DEMO_DATABASE=mongodb://localhost:27017/demo?retryWrites=true&w=majorityChat Message Life Time
On the frontend, change how long a message shows by changing the public messageShowTime variable on ChatManager.cs. That value is sent to the server when joining or creating a room in MMOManager.cs:
private async void JoinChatRoom()
{
    Colyseus.Room<ChatRoomState> chatRoom = await client.JoinOrCreate<ChatRoomState>("chat_room", new Dictionary<string, object>() { { "roomID", Room.Id }, {"messageLifetime", ChatManager.Instance.messageShowTime} });
    ChatManager.Instance.SetRoom(chatRoom);
}
Adding Your Own Interactables
If you want to add a new interactable to the client, it must inherit from Interactable.cs. Check out any of the other Interactables for ideas of what you can do. If you want to override the serverType value on you Interactable, you should ALSO add a case for your new serverType on the server in interactableObjectFactory.ts:
export  function  getStateForType(type: string) : InteractableState {
	let  state : InteractableState = new  InteractableState();
	//Any new types need an appropriate constructor in here or they will return empty
	switch(type){
		case("DEFAULT"):
		{
			state.assign({
				coinChange :  0,
				interactableType :  type,
				useDuration :  5100.0
			});
			break;
		}

		case("BUTTON_PODIUM"):
		{
			state.assign({
				coinChange :  1,
				interactableType :  type,
				useDuration :  10000.0
			});
			break;
		}
		case("COIN_OP"):
		{
			state.assign({
				coinChange : -1,
				interactableType :  type,
				useDuration :  5100.0
			});
			break;
		}
		case("TELEPORTER"):
		{
			state.assign({
				coinChange : -2,
				interactableType :  type,
				useDuration :  5100.0
			});
			break;
		}
	}
	return  state;
}
The variable coinChange is the amount a user’s coin count should change upon use. If the value is negative (the interactable COSTS coins to use), the server confirms the user has enough coins before responding with success. See the function handleObjectCost in MMORoom.ts:
handleObjectCost(object: InteractableState, user: NetworkedEntityState): boolean {
    let cost: number = object.coinChange;
    let worked: boolean = false;

    //Its a gain, no need to check
    if (cost >= 0) {
      user.coins += cost;
      worked = true;
    }
    //Check if user can afford this
    if (cost < 0) {
      if (Math.abs(cost) <= user.coins) {
        user.coins += cost;
        worked = true;
      }
      else {
        worked = false;
      }
    }

    return worked;
  }
If this check is successful, object interaction will move forward normally.
The variable useDuration is used to factor in how long an interactable will remain inUse after a user interacts with it. When an interactable gets used, it’s availableTimestamp is set as so:
interactableObject.inUse = true;
interactableObject.availableTimestamp = this.state.serverTime + interactableObject.useDuration;
The server then checks on each timestep:
checkObjectReset() {
    this.state.interactableItems.forEach((state: InteractableState) => {
      if (state.inUse && state.availableTimestamp <= this.state.serverTime) {
        state.inUse = false;
        state.availableTimestamp = 0.0;
      }
    });
  }
This resets the inUse value for any interactables in the MMORoom if the serverTime says it’s time to do that.